In this chapter we will walk you through the main functions of Chat. Make sure to add your Chat accounts first to use this feature.
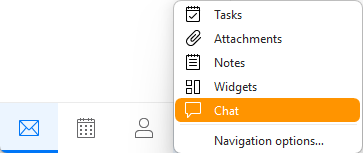
The Chat section is one of the options in the left pane menu at the bottom - you can find it via the additional options under the 3-dot button, or you can customize the Navigation options to move it up if you use the Chat more often than Calendar and Contacts.
You will see your Chat account list to the left, same as you view accounts and folders for Mail and other sections.
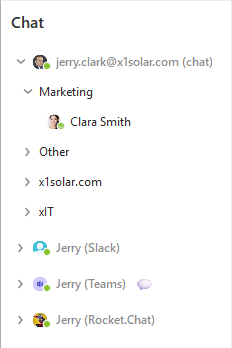
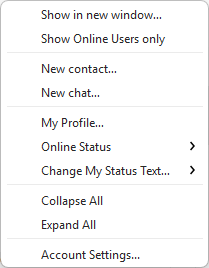
You can right-click the account name to view additional options, some of them also available in the Toolbars, some unique to this menu.
The top Toolbars options will depend on which account you have opened - XMPP / Jabber account, Slack, Teams or Rocket.Chat.
To send a message to your chat contacts, click on their name in the left pane list, that will open the specific Direct chat in the middle part of the main window.
Multichats, Channels, Threads in the Chat collaboration accounts work the same way - open them in the left pane to view the old chats and add your own replies.
To explain these terms, this is what they mean in the chat collaboration accounts:
In the middle pane you will see the message history with the given contact or of the given channel/multichat and at the bottom you can write your own chat message:
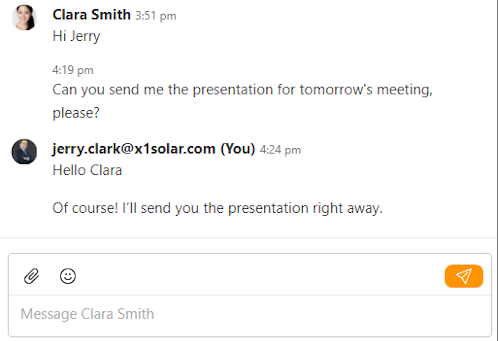
In the message field you get these options:
Send File 
Click on Send File button to initiate a file transfer session. As soon as you click on the button, an explorer window will appear through which you can select the files you wish to be transferred.
![]()
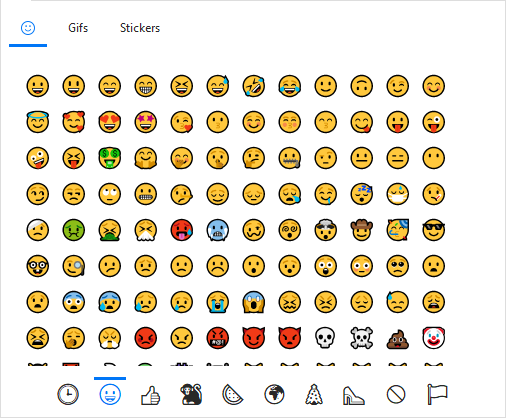
Emoticons / Emoji / Smileys

Click on the Emoticon icon to insert an emoticon, aka a smiley, to your text message. Because the Chat system is capable of handling multiple chat networks, smileys are always inserted in their text form.
You can also insert Gifs or eM Client Stickers which are special images provided by eM Client app.
Send button

Use the Send button with the paper plane to send off your message or attached file.

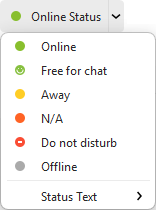
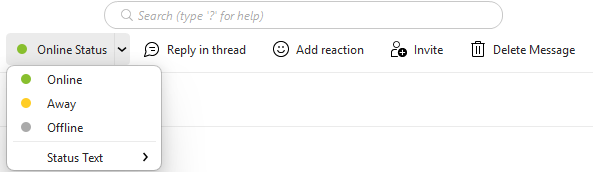
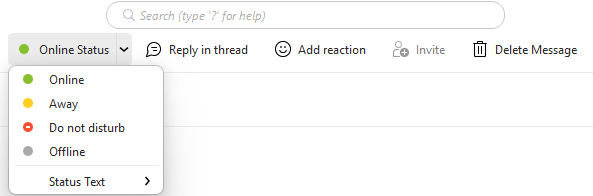
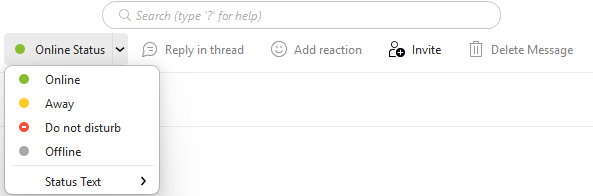
Using this option you can set your online status for the account you have currently selected. You can also set Status text that will be visible to your chat contacts.
Add Contact
By clicking on the Add contact button you will be allowed to create a new contact - the following window will be displayed:
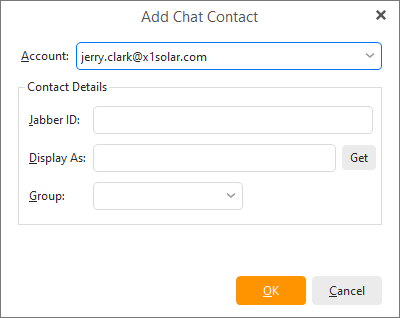
You can type-in a name that you would like to be displayed by the Chat contact or you can click on Get button by which the application will try to retrieve the username based on the Jabber ID.
You can also add newly created Chat contact to the appropriate group by selecting it from the list of groups that you are currently using.
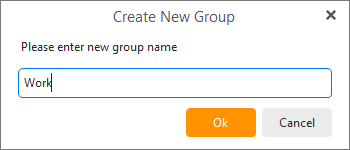
In the left pane, Chat contacts can be stored in Groups.
You can move contacts between groups simply by drag-and-dropping them, or by right-clicking the contact you wish to move and selecting the group you want to move the contact into from the context menu. You can also create a new group and move the contact into it.

You can edit and publish your personal profile for your chat contacts on the Jabber/XMPP network to see.
In the Chat Profile window you can enter general information about yourself and details about your work, your address and even write a little paragraph about yourself in each of the four information tabs in the Chat Profile window.
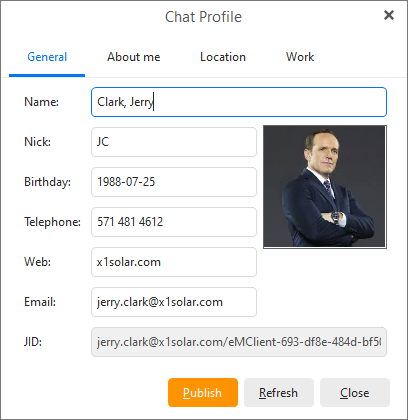
When you have finished editing/updating your profile, click Publish to post your changes to the network.
Authorization requests
When your acquaintances add you to their Chat clients, be it ICQ or others XMPP services, an authorization notice will be sent to you requesting your permission for them to contact you.
These Contact subscriptions are gathered and managedin Chat Authorization Requests system.
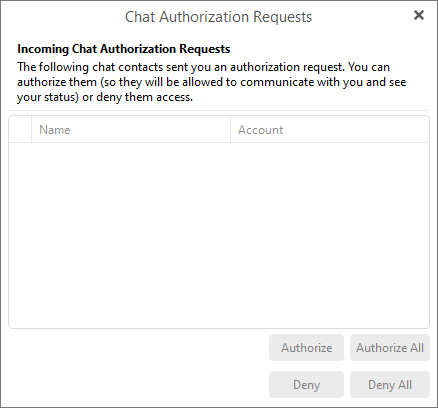
In the Authorization Requests Manager window the contacts will be listed that are requesting to add you to their contacts list.
You may view their user profiles by right-clicking the account name .
You may select authorize or deny authorization to contacts individually by using the buttons in the low right-hand corner.
Once authorized, your contacts will be able to see you and chat with you through their Chat clients. If you choose to ignore their subscription request, you are effectively preventing them to communicate with you through Chat.
File Transfers
If your XMPP server supports keeping history, you can view Incoming and Outgoing files here.
Rocket.Chat
Some of these options can also be used via hover on an existing message, such as the emoticon Reaction, Open thread, Edit and Delete for your own messages.
